

Up your knowledge of tires with our UTV Tires 101 blog post. We've all asked the same questions, so let's delve into the basics and explore why tires are the single most crucial factor to consider when upgrading your UTV for the trails.
What is a UTV Tire Section Width?
A tire's section width (also called "cross-section width") is the measurement of the tire's width from its inner sidewall to its outer sidewall (excluding any decorations or raised letters) at the widest point. As noted, this measurement is typically expressed in inches, but it may also be measured in millimeters (mm), which is more common in automotive tires. This measurement is taken without any load on the tire, after the tire has been properly mounted and inflated.

Because the width of the wheel influences a UTV tire's section width, the correct rim width for the measured tire size must be used. The width of a tire mounted on a narrow rim would be "narrower" than if the exact tire were mounted on a wide rim.
The industry rule of thumb is that for every 1/2" change in rim width, the tire's section width will correspondingly change by approximately 0.2" or 5mm.

What are DOT-approved tires?
True or False - The Best UTV Tires are DOT Rated/Approved?
I bet you're here because someone told you DOT UTV tires are better than non-DOT-rated UTV tires. We're not sure where this story originated, but we're here to set the record straight and provide you with the facts.
So, the quick answer for those of you looking to get straight to the point is: FALSE. There are no, nor have there ever been, any DOT-rated or approved tires.
Are some tires developed to perform at ridiculous speeds and under even more ridiculous terrains? You bet. However, it is essential to note that no U.S. law or regulation within the United States Federal Register governs the use or application of UTV tires on streets, roads, or highways in any manner. As of 2023, no classification, regulation, or guideline exists that would make or allow any UTV tire to be considered "street legal" or approved by the NHTSA or DOT.

How about Valor Offroad UTV Tires, are any DOT approved?
No. We'll say it again... there is no such thing as a DOT rated/approved/certified UTV or ATV tire (yet).
The National Highway Traffic Safety Administration (NHTSA) states that Utility Terrain Vehicle (UTV) and All-Terrain Vehicle (ATV) tires offered for sale in the United States incorrectly labeled and marketed as being compliant with DOT Federal Motor Vehicle Safety Standards (FMVSS) are prohibited.
This means that the symbol “DOT” cannot appear on any ATV, UTV, or Not for Highway Service (NHS) tire. Only tires intended for a vehicle certified to the FMVSS are legally permitted to be marked with “DOT” and may be marketed as conforming to the FMVSS.
Language that tires are “approved,” “certified,” or “compliant” with DOT standards are also prohibited per FMVSS standards.
Refer to NHTSA and FMVSS statement below:
According to 49 U.S.C. § 30102, a “motor vehicle” is defined as: (7) ‘‘motor vehicle’’ means a vehicle driven or drawn by mechanical power and manufactured primarily for use on public streets, roads, and highways, but does not include a vehicle operated only on a rail line.
Based on this definition, there are no FMVSS that apply to UTV or ATV tires, because UTVs and ATVs are not manufactured for use on public roadways. Additionally, 49 C.F.R. § 574, Tire Identification and Recordkeeping states:
49 C.F.R. § 574.5(e)(1) - The DOT symbol constitutes a certification that the marked tire conforms to an applicable Federal Motor Vehicle Safety Standard. And:
49 C.F.R. § 574.5(e)(3) – The DOT symbol must not appear on tires to which no Federal Motor Vehicle Safety Standard is applicable.
How to handle a flat tire:
If you haven't had a flat yet, don't worry; you will. We all have the pleasure of changing a UTV tire in the wild at some point, some in more precarious situations than others; yet, rest assured, your day will inevitably come.
Here are the most common questions we get asked regarding flat tires:
- What are the first steps to take?
- What should I bring with me on my UTV in case of a flat tire?
- Can't I drive with a flat tire back to the trailhead?
- Plugs? Spare Tire?
- Winch or Jack? Or both?
Read the signs
Regardless of how prepared you are to handle a flat or punctured tire while off-roading, the early signs of tire failure can determine the severity of vehicle and trail damage.
- What does it feel like? Your vehicle will feel pulled to the side by the flat tire, and acceleration could feel sluggish. Any abnormal vibration immediately detected on the steering wheel is a gold-standard indicator for UTV tire failure.
- Visual Clues: You may notice abnormal wear patterns on your tread. Before any ride, look for bulging or blistering, as well as noticeable sagging or flatness. While in motion, you may detect a faint burning rubber smell, accompanied by no visible smoke.
Flat Tire Kit Essentials
- Tire plug kit
- Jack (Compressed air, hydraulic, or balloon)
- Tire pressure gauge
- Optional: A Pair of gloves
- Compressor or CO2 cartridges (pack extra for 35"+ tires)
Step-by-step instructions on how to fix a flat on a UTV:
- Get all passengers out of the vehicle and try to roll or winch your way to a flat area. If you try to jack your UTV up on a slant, gravity will win 100% of the time, and you'll end up with more damage than you started with, as well as the potential to hurt or harm anyone involved.
- If no flat ground is accessible, determine the best approach to your unique situation (e.g., winch from the side, roll until you reach flat ground, and safely level the vehicle using available terrain).
- Grab your tire plug kit, locate the puncture, and clean the surrounding area.
- Clear debris and clear the hole's edges by inserting the jagged tool through the puncture.
- Scrape up the area around the puncture and apply cement to the surrounding area.
- Thread a plug through the eye of the insert tool and insert the plug into the puncture.
- Remove the insert tool and cut off the protruding ends of the plug.
- Use a compressor to inflate to the preferred PSI
- Check for leaks often
Can I drive to the trailhead with a flat?
Unless you've exhausted all other options and this is your absolute LAST option to get your party home safe, the answer is No. Riding without proper tire pressure can damage your wheel, hub, and suspension, resulting in thousands of dollars in repairs. It could even delay your recovery if you further destroy the moving parts of the vehicle.
Tire plugs or bring a spare?
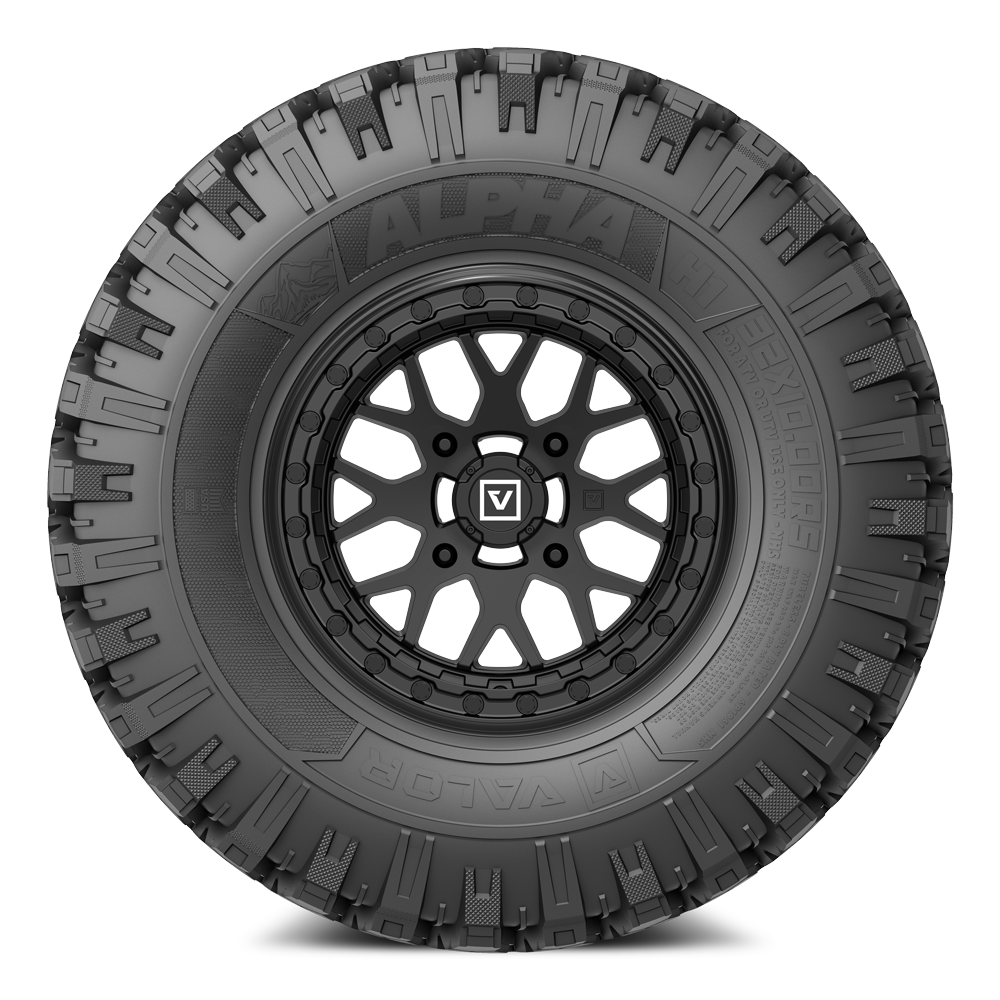
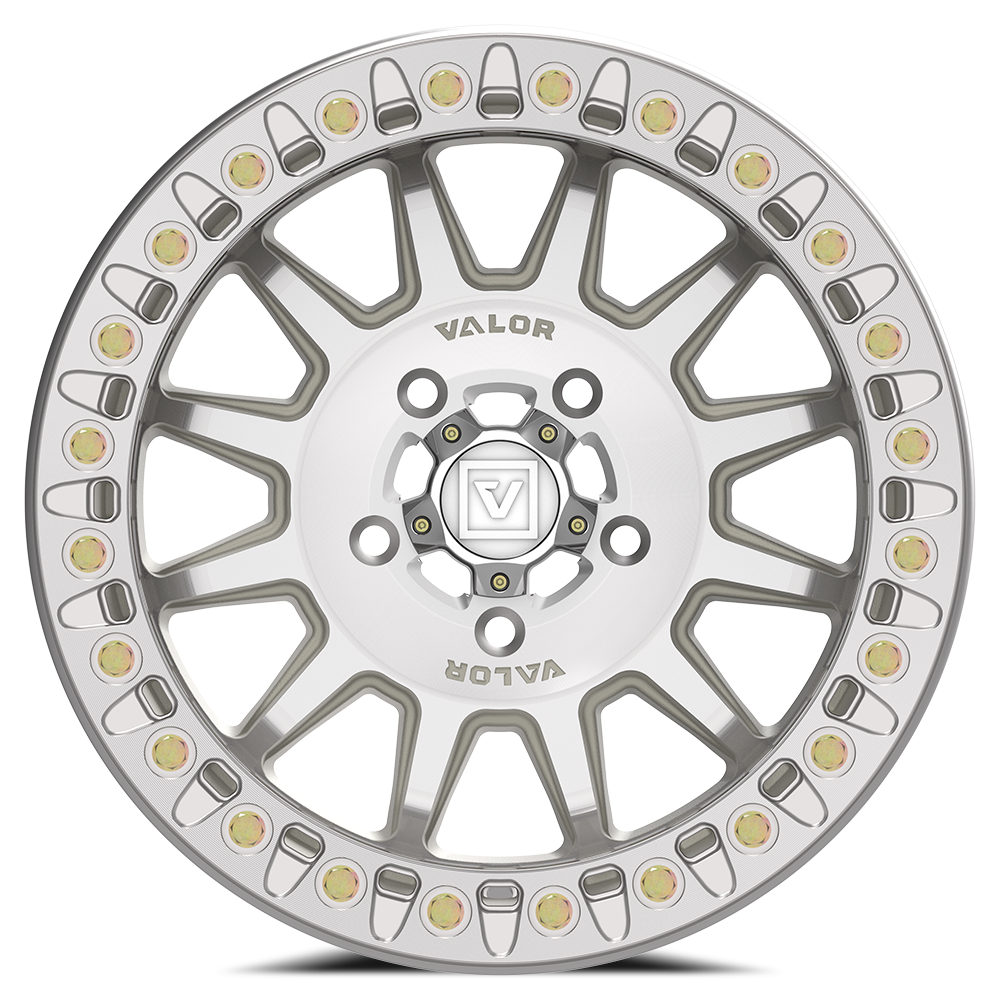
If you can bring both, do it. Carrying a spare is always a great idea for you or anyone else in your party who may experience a flat tire. Valor Offroad has the industry's first dual-drill UTV wheel, specifically designed for recovery situations where your spare has both 4x137 and 4x156 bolt patterns, to fit nearly all makes and models of UTVs and ATVs on the trail. Click to learn more about our Dual Drill UTV wheels.
Tire plugs are essential, and it's always a good idea to carry a complete tire plug repair kit with you when riding. Most kits are under $40 and are one of the cheapest solutions for simple puncture flats, so you can finish the ride instead of limping back to the trailhead.
Winch or Jack? Or Both?
This is a very personal decision; however, each has its positives and negatives. We typically see about 1/2 of the riders on the trail use a winch, while the other 1/2 carry a jack. This depends on your specific riding terrain; however, in the Rocky Mountains, you will need one or the other.
- Winch Negatives: Heavy. Expensive. Adds additional weight to something you may never use. Requires maintenance to ensure proper functionality and user safety, as it relies on several other bulky components.
- Winch Pros: Can get you out of almost any situation as long as you have a way to anchor your winch. No matter the slope angle or approach, winches are by far the most useful recovery tool on the market.
- Jack Negatives: Must be on flat ground for safe use. Can be bulky and require a mount depending on the style. Moderately expensive, depending on the brand and type.
- Jack Pros: Quick to set up and use. Compact versions that use compressed air are lightweight and require minimal storage space. Don't require an anchor point and bulky straps.
Recovery Kit Essentials:
Every rider should have a recovery kit or system in their storage. These systems come in every shape, size, and price tag; however, find one that meets the basic needs of getting you safely home in the event of a bad situation. We recommend, at the very minimum, the following items:
- 1x Heavy duty snatch strap (preferably with stretch or kinetic) at 15'+ and at least a 4500# or higher load rating.
- 2x Soft shackles (Won't scratch your UTV)
- 1x Tree saver strap
Note: Always bring an extra belt. For the money and weight, it may be the difference between walking and driving.
Here is a great video on how to recover your UTV using your winch:
ATV Tires vs UTV Tires
So you're an ATV owner—good on you. You've resisted consistent market change, where everything seems to be catered to and built exclusively for UTV owners. The good news is that there are still plenty of products on the market, specifically manufactured for you, ATV owners. But what exactly is the difference? Is there truly a UTV-specific product? The quick answer is no, but let's discuss.

No matter your favorite flavor, UTV, SXS, or ATV, there are products proudly made for you by several high-quality brands, including Valor Offroad, SDR Motorsports, HCR Racing, and SuperATV. Brands tend to latch onto what is most popular or trending in the market to boost website SEO or attract more attention via marketing, so it is no surprise that UTVs are getting all the hype these days. It's hard not to disagree that a 240-horsepower out-of-the-box machine is fantastic.
The most significant difference between UTV-specific products, such as ATV tires, is one critical specification: load capacity. The bonus for ATV owners is that most powersports products are over-engineered for UTVs. The downside is that products continue to get heavier to compensate.

Quick weight comparison:
Polaris Sportsman: 911 lbs (413 kg)
Polaris RZR Pro R Ultimate: 2187 lbs (992 kg)
When browsing tires for your ATV, be sure to check the load rating to ensure it matches your vehicle's weight. All the tires featured on this site are load-rated for UTVs, which means your ATV will never risk overloading the tires, regardless of your payload. But...not all tires are created equal. If you purchase a set of tires on Marketplace or through a third-party sale, ensure the tires are in good condition before running them, regardless of the good deal you got.

What to look for if purchasing used ATV tires:
- Tread: This is obvious, but always make sure there is enough tread left on used tires. If the tread wears down completely, you will be traveling on the carcass of the tire, which we promise was never intended to tackle roots, rocks, or trail debris. You'll risk immediate tire failure.
- Age: Unfortunately, ATV tires have a recommended use window. If you pick up a tire from an ATV built in the 1980s, that tire will likely show significant wear and tear, including dry rot (cracks and crumbling), an irregular shape (oblong), or pinhole leaks. The natural rubber in tires breaks down as they age, particularly when exposed to the sun's ultraviolet (UV) rays.
Considerations:
All Valor Offroad UTV products are engineered with the heavier UTV specs in mind, so both UTV and ATV customers are covered.
Do UTV Tires Need to be Balanced?
What exactly is balancing a UTV tire? Tire balancing is the process of correcting uneven weight distribution within a wheel and tire assembly to ensure a smooth, vibration-free ride. It's achieved by adding small weights to the inside of the rim to counteract any imperfections in the tire or wheel's shape or manufacturing, which can cause an imbalance.
Weight Application: Small weights are strategically placed on the rim, usually on the opposite side of the heavier spot, to counterbalance the imbalance and restore a smooth, even rotation.
Benefits: Tire balancing improves ride comfort, reduces vibration, minimizes tire wear, and can even improve fuel economy. Why is balancing necessary? Smooth Ride: Unbalanced tires can cause your steering wheel, floorboard, or seat to vibrate, especially at higher speeds.
Tire Wear: Uneven weight distribution can lead to accelerated wear and tear on the tire, with certain parts of the tire wearing down faster than others.
Overall Vehicle Performance: Proper tire balancing helps maintain the vehicle's handling, stability, and overall performance.
Soooo, do I need to balance my UTV tires?
The quick answer to this complicated question is... it depends.
Yes, UTV tires can benefit from balancing, especially if you ride at higher speeds or you're planning to race your vehicle. Balancing helps prevent premature tire wear, improves ride quality, and can extend the lifespan of your tires. However, at lower speeds (under 40 mph), balancing might not be as critical. Balancing is generally recommended for a smoother, more comfortable, and more efficient ride; however, again, it is not necessarily required.
A large percentage of UTV drivers aren't going to benefit from the expense of balancing their UTV wheels and tires. The simple reason is that the terrains and speeds that are typically traversed (rocky, rooted, knobby, pitted or muddy trails), render a perfectly balanced wheel and tire assembly pointless. Remember, speed is where you'll feel the imbalance, so tooling around a mountain OHV trail at 15-20 mph is going to be bouncy and rough, no matter how balanced your tires are.
Here's why UTV tires benefit from balancing:
- Improved Ride Quality: Balanced tires reduce vibrations, making for a more comfortable and less fatiguing ride, especially at higher speeds or on rough terrain.
- Extended Tire Life: Balancing helps prevent uneven wear patterns, which can shorten tire lifespan.
- Better Handling: Balanced tires contribute to better handling and control, especially in corners and on varied terrains.
- Reduced Stress on Components: Unbalanced tires can put extra stress on suspension and other drivetrain components, potentially leading to premature wear or damage.
What happens when a tire is overinflated?
You've picked out your favorite wheels and tires, and now you're wondering how to mount them in your garage, right? First things first, we always recommend having a professional tire and wheel shop mount tires onto wheels, especially if the wheels are of the beadlock variety. Any tire shop has the tools to properly (and safely) seat your tire beads and inflate to the manufacturer's (tire and/or wheel) specifications.
Nope, I'm determined to mount these tires myself
We get it, you like to do things on your own. But let's discuss some of the dangers and warnings that inherently come with mounting a tire to a wheel.
When it comes to air pressure, too much can truly be a bad thing. Your tire's sidewall contains a wealth of information regarding the manufacturing process, speed index, whether your tires are highway safe, and, most importantly, the maximum PSI inflation pressure. Don't see it in the small print? Reread both sides of your tires; it's there. This spec is on every tire, allowing tire technicians and weekend warriors to determine the maximum pressure they can use while seating the tire bead(s). Need a refresher on some of the components of a tire and wheel, and how they work together to hold air?
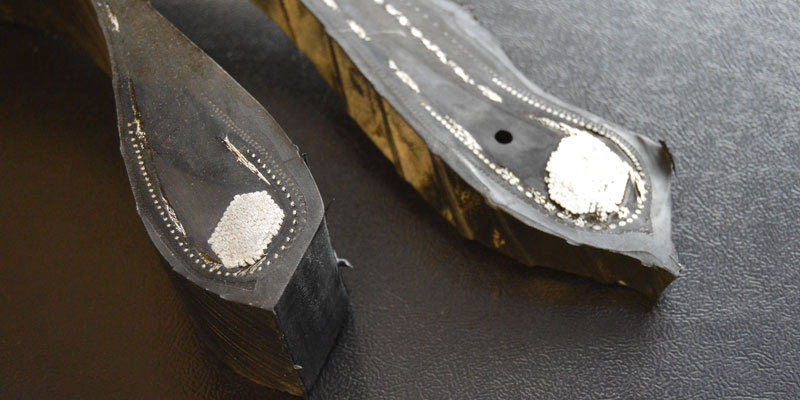
What is a tire bead?
- The bead of a tire is located near the edge of the inner lining, where the tire rubber makes contact with the wheel barrel. The bead is a loop of coated steel wires that are wound tightly to exert pressure on the outer lining.
What does a tire bead do?
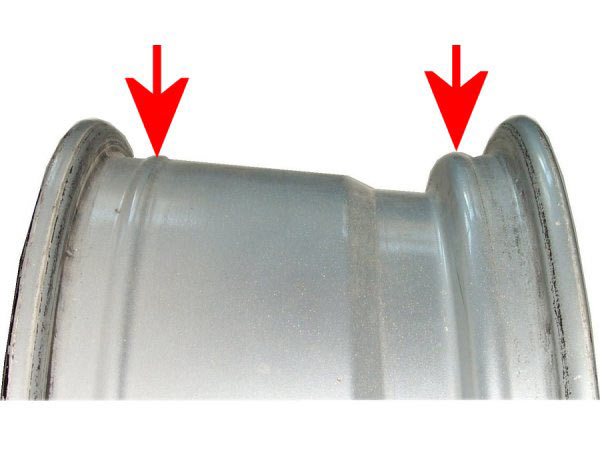
- Wheels are engineered to have a bead hump, so that as increased air pressure forces the bead toward the edge of the wheel barrel, the bead slides over the wheel bead hump into what is called the bead gap, holding the bead in place. If you ever hit a curb or rock, and get a flat tire, more than likely you pushed the tire bead away from the bead gap, back over the wheel bead hump, allowing air to escape. When the tire is inflated correctly, the air pressure within the tire keeps the tire bead in this groove.
- The bead forms an airtight seal against the wheel, allowing for a more efficient transfer of forces as the vehicle moves. Rubber compound is found near the tire bead’s steel wires, reducing the flexibility of the wires and deflecting damaging forces. Essentially, the filler acts as a shield to protect the tire bead from potential harm from the road.
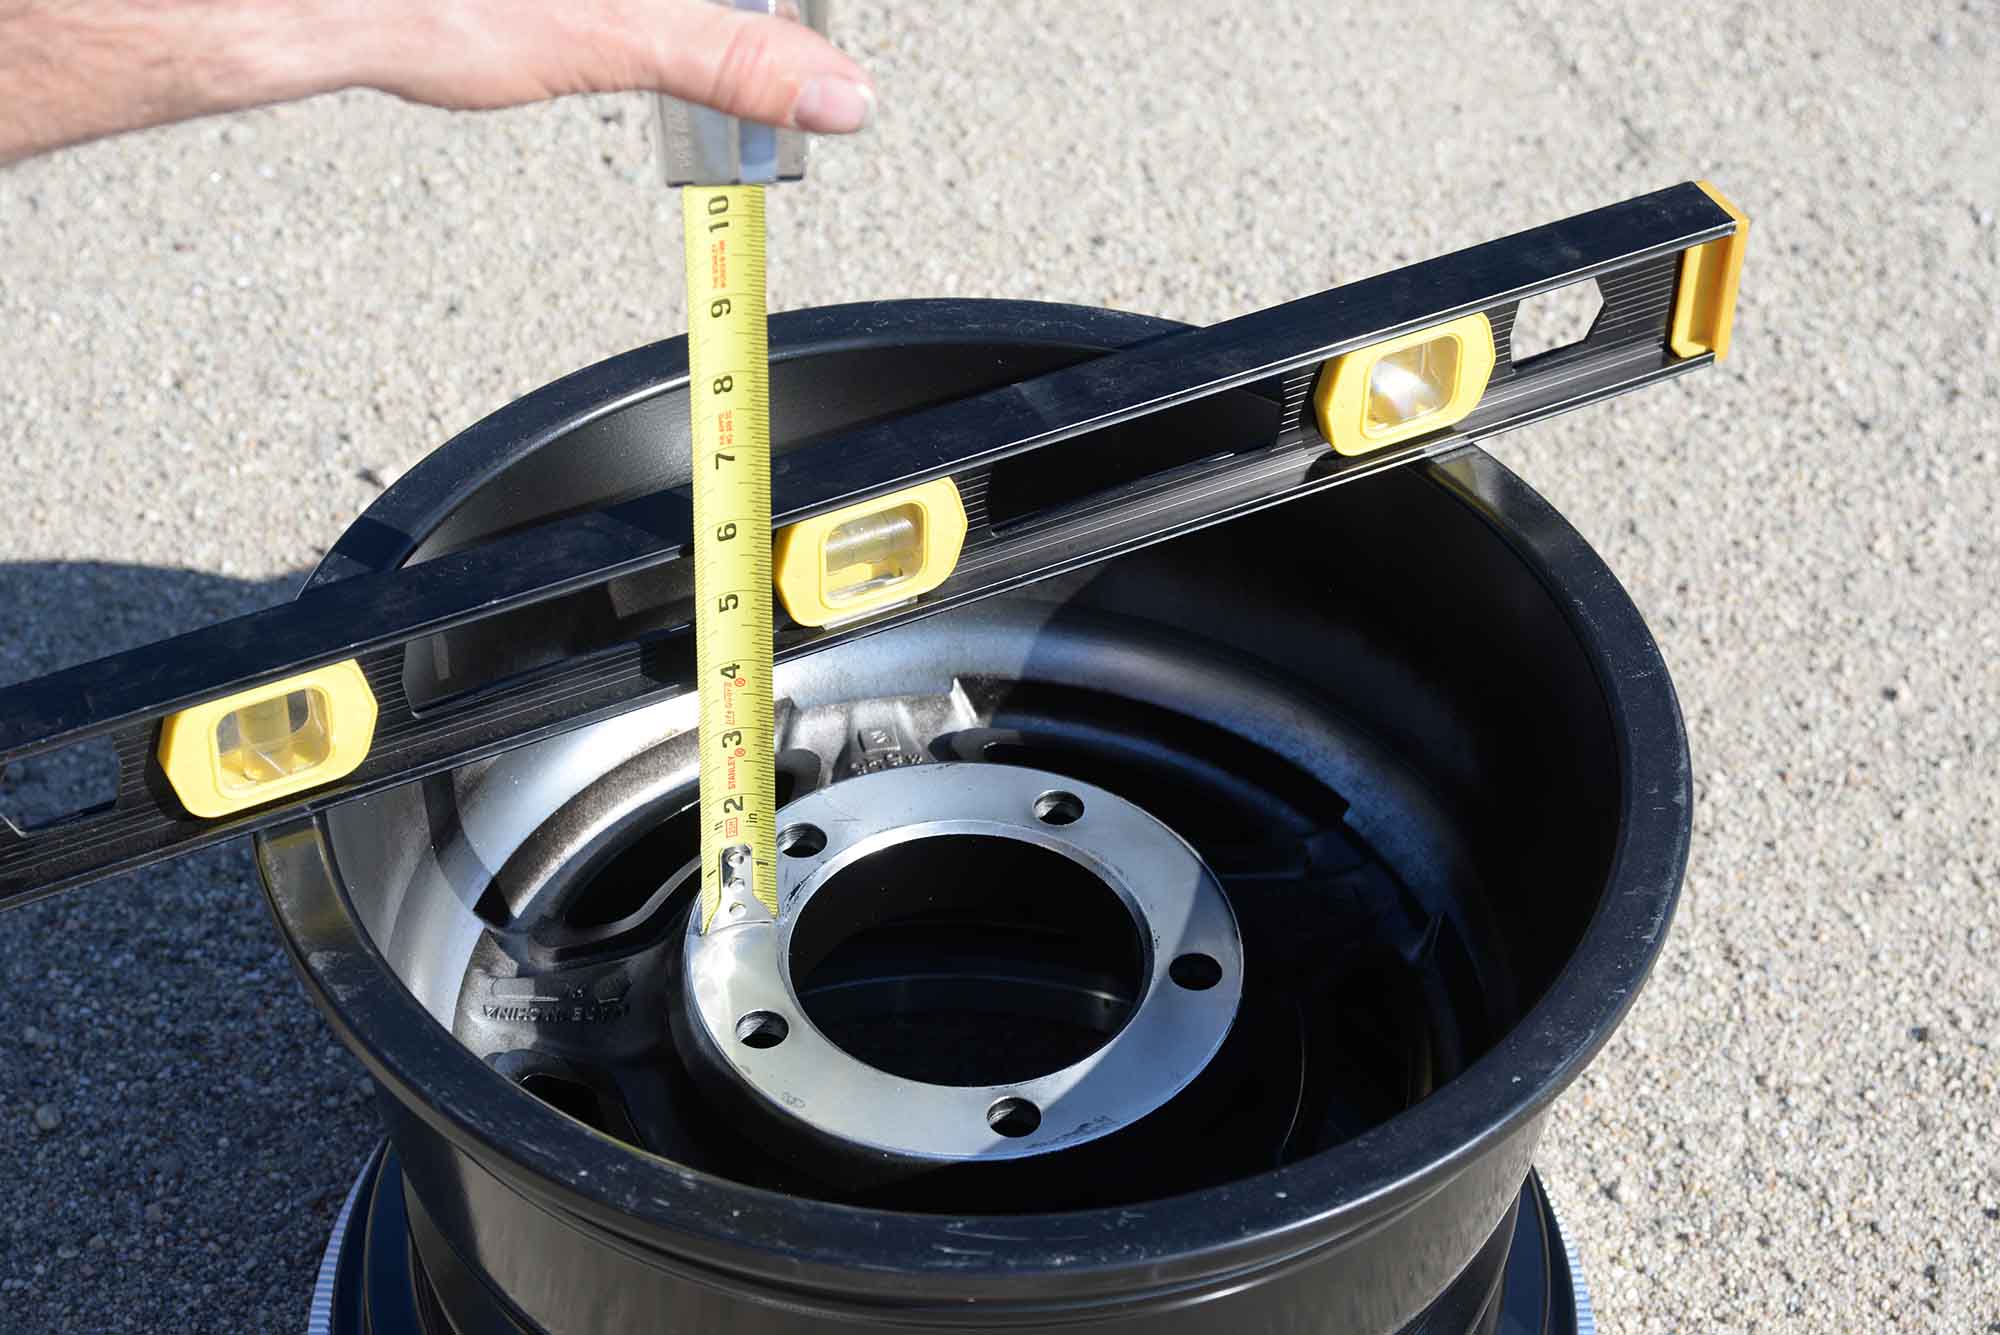
Looking at image below, the two arrows indicate the "bead hump". The bead hump refers to a raised hump on the wheel barrel that the tire bead must clear to "seat" the bead. The space between the wheel lip and the bead hump is referred to as the "bead gap." High pressure and lubrication are the only ways to ensure a rigid tire bead crosses the bead hump and seats correctly in the bead gap.
What qualifies as an overinflated tire?
- All modern tires have a maximum inflation pressure specification located on the sidewall. If you don't find the maximum inflation pressure, check the other side of the tire; it's likely to be there. This specification informs all users of the absolute maximum air pressure the tire can withstand, regardless of whether it is already installed on a vehicle or not.
- If you accidentally exceed the manufacturer's maximum inflation pressure by a few PSI during mounting, don't worry; release the pressure immediately to the proper mounting specification. We typically recommend installers not exceed 40 psi as a general rule, but this all changes depending on what brand, size, or style of tire you're working with. Suppose you exceed the maximum inflation pressure specification by more than 5 psi. In that case, you may damage the tire's integrity, and we recommend having a professional tire shop inspect your tire(s) to ensure they are safe to use.
Safety risks of over-inflated tires
- Trust us when we say that you don't want to experience a tire blowout. At best, you will be out several hundred dollars for a replacement; worst case scenario is death. By over-inflating your tires, you are putting yourself and everyone around you at risk of injury as the concussive explosion can fire debris at incredibly high speeds, causing hearing/sight loss or life-altering injuries. There is a very good reason every tire manufacturer lists a maximum inflation pressure spec(s) on every tire, and it is because anything over this specification can lead to a catastrophic failure.
Wear and tear
- Yep, overinflation will cause your tires to wear out more quickly than properly inflated tires. Higher air pressure distorts the tire's profile, forcing only the crown (center) of the tread to be in contact with the trail or terrain.
- Overinflation can significantly impact the performance and longevity of your tires. Overinflation causes your tires to be more rigid and stiff. Not only will you feel every rock, debris, hole, or root, but you're also more susceptible to tire damage or flats.
Having trouble mounting your tires to your wheels?
- If you feel like you've tried every possible angle, tool, device, or curse word at your disposal with no luck in seating your tire beads, stop. Take your tires to a professional tire shop that can utilize an entirely new arsenal of pro-grade tools to get that stubborn tire mounted.
NEVER USE DANGEROUS AIR PRESSURE LEVELS TO SEAT YOUR TIRE BEADS
Correct UTV Tire air pressure?
Tire pressure is an age-old discussion among UTV and ATV enthusiasts, each one thinking they know the secret decimal to perfect offroading. The truth is, they're all right. The perfect tire pressure is a spectrum, and we're here to offer our advice on where to start. You can then adjust the pressure to your liking by inflating or deflating the tires as needed.
Whenever we mount up a set of wheels and tires, we always start with a PSI spec of 15 lbs. Not too squishy, not too firm, 15 is the best balance of hardpack and crawling. Make note, if you plan to ride exclusively on hard pack at high speeds, consider starting at 18-20 PSI. Alternatively, if you roll off the trailer and you're crawling 99% of the trail, you may drop to 10-12 PSI for that extra bite when needed. When in doubt, consult your owner's manual and use the OEM spec set at your dealer.
How does tire pressure affect steering/handling?
Remember that your UTV tires are your first line of defense against bumps, dips, whoops, and trail chatter. Yes, your suspension and shocks will help absorb some of that chatter as well, but consider your tires as the most critical factor in achieving a smooth and comfortable ride. The proper pressure at the right time for the correct speeds can make or break a full-day ride.
Does elevation affect UTV tire pressure?
Significant changes in altitude affect tire pressures when traveling from one elevation to another. Fortunately, this influence is relatively small. As altitude increases, atmospheric pressure decreases. If you plan to ride a trail that climbs 1,000 feet or more, do a test. Record your tire pressure at the trailhead and then at the top, and you'll see your tire pressure has increased.
Does temperature affect pressure?
The tire pressure recommended in your vehicle's owner's manual is the manufacturer's recommended cold tire inflation pressure. This means that it should be checked in the morning before you drive more than a few miles, or before rising ambient temperatures or the sun's radiant heat affect it.
Air expands when heated and contracts when cooled. This makes the fall and early winter months the most critical times to check inflation pressures. The rule of thumb is that for every 10°F change in air temperature, tire pressures will change approximately 2% (increasing with higher temperatures and decreasing with lower).
In most parts of North America, the difference between average summer and winter temperatures is approximately 50°F, resulting in a potential loss of about five psi as winter temperatures set in. A 5 psi loss is enough to compromise handling, traction, and durability.
Does tire pressure change over time?
Since typical tire pressures range from 15 to 25 psi for most UTV tires, a constant force is trying to push the air through the tire. This allows some of the air to escape (called permeation) right through the microscopic spaces between the rubber molecules. And somewhat like a rubber balloon, the air will eventually escape if it is not replenished. All things being equal, a tire's inflation pressure will decrease by approximately one psi per month. If air isn't added for two to three months, the tire's inflation pressure will probably be 2 to 3 psi low.
Note: Remember to check your spare tire combo every couple of rides. You don't want to be in a pinch and have your spare fail as well.
Disadvantages of UTV tire underinflation
An underinflated tire can't maintain its standard shape and becomes flatter than intended while in contact with the road. This can lead to premature tread degradation by up to 25% compared to the OEM-recommended pressure. Lower inflation pressure will allow the tire to deflect (bend) more as it rolls. This will build up internal heat, increase rolling resistance, and cause a reduction in fuel economy of up to 5%. You would experience a significant loss of steering precision and cornering stability. Never drive at high speeds under low tire pressure!
Disadvantages of overinflation
An overinflated tire is stiff and unyielding, and the size of its footprint in contact with the road is reduced (hence why people deflate when rock crawling). If a UTV's tires are overinflated by six psi, they may be more susceptible to damage when running over obstacles or navigating rough terrain, especially at higher speeds. Higher-inflated tires cannot isolate trail irregularities well, causing your ride to be much harsher. However, higher inflation pressures usually provide an improvement in steering response and cornering stability up to a point.
How to correctly lower your tire pressure
Your dad probably taught you that any old rock, stick, or even your car keys work just fine to reduce air pressure in your tires. Although he's technically correct, the process takes entirely too long when we're talking about dropping 20 PSI on 35" A/T tires. The reason is that, for example, using a stick allows air to escape only around the stick, not through it. If you remove the stick altogether, imagine how much more air you can move in or out of the tire. The same principle applies to airing up your tires. You'd never leave the valve stem core to inflate, so unless you're only adjusting by a few PSI, the same applies to deflating.
Another disadvantage to using trail debris to adjust your tire's PSI is the loss of precision. It's virtually impossible to get all four of your tires to be the same PSI using the "stick" technique. Using an accurate tire deflator is recommended before leaving the trailhead or parking lot. We emphasize "before" you go because the rest of your riding party doesn't want to stand around and watch you fiddle around with your tires ten minutes into a ride. A tire deflator offers precision and rapid deflation in a compact, portable, and reasonably priced package.

What is a tire bead gap?
You may have heard someone referencing the tire bead or tire bead gap and thought to yourself..."WTF is that?". No worries, we're here to help explain what a tire bead is, why tire bead gap on your wheel matters, and offer some suggestions on how to choose the correct wheel and tire combos.
The Basics
If you've never actually mounted a tire to a wheel (bike, car, utv, etc.), it's easy to assume you simply fill the tire with air and it magically stays on the wheel. What makes the magic happen is a combined effort between your favorite wheel and tire companies. There are many safety measures both wheel and tire manufacturers take to ensure each product properly beads, has ample strength for side impact, and guarantees that the bead stays in place.
What you need to consider is that if you alter the recipe of this process (lowering air pressure below suggested psi, or going speeds not recommended for both wheel or tire), you're going to test the limits of these safety measures and you'll be putting you and your passengers in harms way.
Let's address each part and piece that makes a successful tire and wheel combo.
UTV Tire Bead
The tire bead is the term used for the edge of a tire where the rubber makes direct contact with the wheel. The tire bead is a super-stiff loop of coated steel wires that are tightly wound to exert pressure on the outer lining of the tire. The function of a tire’s bead is to firmly adhere the tire to the outer surface of the wheel. It uses pressure from the wires to mold the rubber to the wheel’s frame. The bead forms an airtight seal against the wheel and allows for a more efficient transfer of forces as the vehicle moves. The rubber compound surrounding the tire bead reduces the flexibility of the wires and deflects damaging forces, especially in harsh environments like rock crawling or hard turns at high speeds.

Tire Bead Gap
Now that you have a good foundation on what makes a tire bead so important, we need to look at how a wheel's tire bead gap is equally as important.
Because each tire bead can vary in thickness (sometimes drastically), it's important to know that the available bead gap on a wheel can also vary. This presents a unique issue when deciding what tire to choose for your specific wheel. If the tire's bead is too thick for your wheel's bead gap, installing can be difficult and potentially dangerous once installed on a vehicle.
As the tire industry evolves, we're seeing larger and larger tire beads, which is a good thing. Stronger beads means a greater force on your wheel when you want to air down. The problem with this evolution is that most wheel companies are slow to evolve at the same pace.
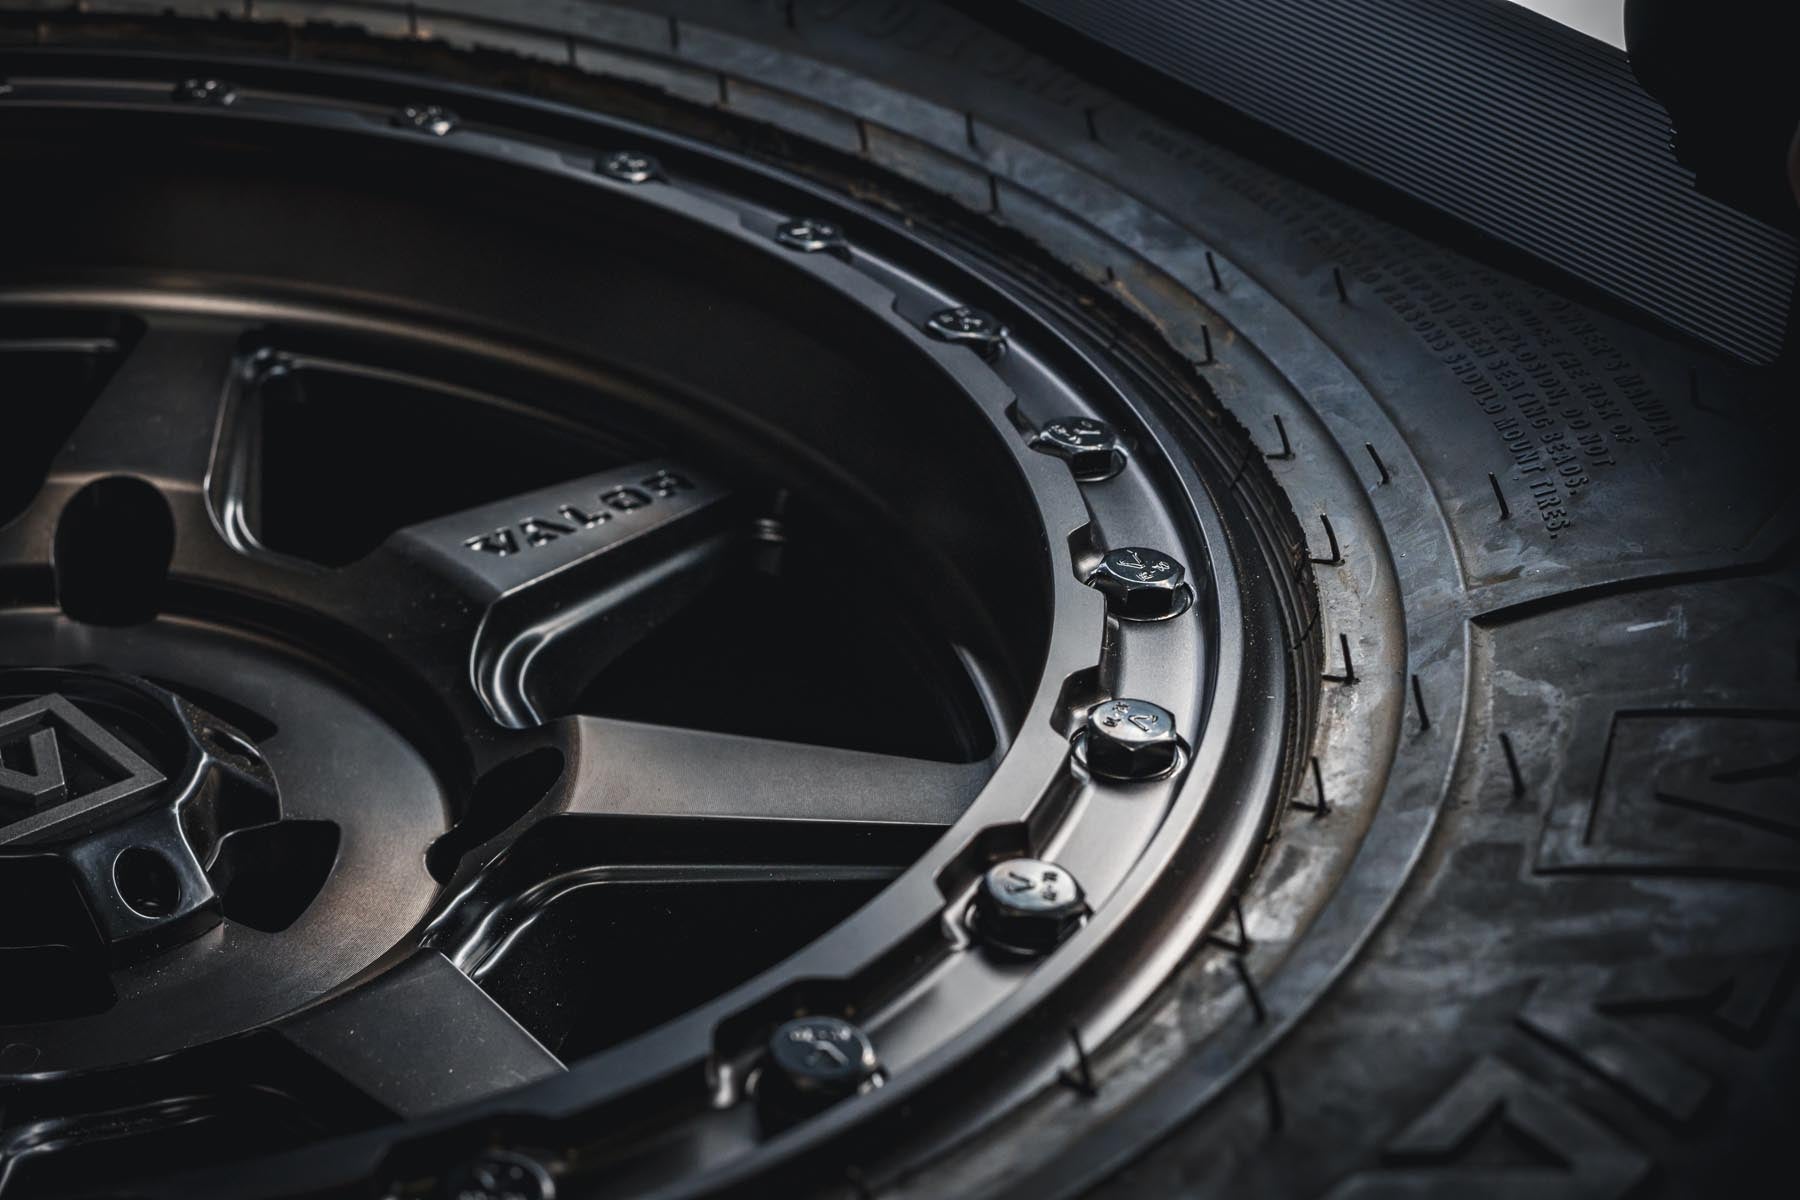
All Valor Offroad UTV wheels use a larger than industry average 9-10mm bead gap to ensure that no matter what tire you pick, our wheels can safely accommodate. Not sure how large your wheel's bead gap is? Use a micrometer and measure from the inside of the bead hump to the inside of the wheel's lip flange (or ring for bead lock wheels). This is the maximum space allocated for your tire's bead. If the tire's bead thickness is larger than the bead gap... you're asking for issues. We recommend you do a quick spec search on other brands and you'll likely find most are between 6-8mm.